Tuesday, June 9, 2015

What Does the Cox Say? 4th of July Wreath


This is one of the #TBT posts from when my blog used to be Cox's Corner. I STILL love this wreath so much and it has held up nicely for the last 3 years! 

I had seen a wreath similar to this one all over pinterest. I believe the original source is here.  I didn't really like the tutorial because I was nervous about the way the tulle was tied that it would fall apart too easily! So I did my own thing and decided to share it with you! 

Supplies:
You will need similar supplies as my 4th of July Tutu Tutorial
3- 25 yard spools of tulle (my red and blue are 100 yard spools it's cause I knew I'd be using them a lot!)
Scissors
9 to 11 inch piece of cardboard (depending on how long you want your tulle to stick out from the wreath.
Decorative stars
Small piece of ribbon to hand your wreath
Wreath form (I just took a pool noodle and formed it into a circle and taped it together) 
Hot glue gun and glue sticks
Wire cutters if your stars have wire sticks on them. 

1. You will wrap your tulle around your piece of card board 66 times. One time around is wrapping your tulle from the front all the way around the back. 66 times each color. This number depends on how large your wreath form is, if it's smaller than the diameter of a pool noodle, you will lessen that number.
2. Once you do your 66 loops around, you will cut on the edge that you started at. Cut there ONLY, otherwise your tulle will be too short! Please note my thumb, do you see the first layer of tulle sticking out?
When you are finished looping and cutting, you will have three sets of 66 layers of tulle. Just set the blue aside, you will not need this until later.
3. Take 2 pieces of your first color. Tie your tulle around your wreath form in a square knot (right over left, left over right). REMEMBER how you did it because you will alternate which side goes over as you switch. A good way to remember is that ALL of your red strips are tied right over left, left over right, 
and ALL of your white strips are tied left over right, right over left. You dig?
4. Alternate your red and white strips of tulle remembering your rule:
ALL of your red strips are tied right over left, left over right, and ALL of your white strips are tied left over right, right over left. You dig? 
By following this method you will achieve a much fuller wreath. 
As I tied my knots I made sure that they all lined up together and they were actually closer to the bath of the wreath form instead of directly in the middle. They were slightly off center. You can see in the picture below. 
You can also spread out your tulle to make sure that it's covering your wreath form.
This is how your wreath should look about halfway through. 
5. You will want to continue alternating your red and white tulle until you get to about 3/4 of the way around. I liked to fluff the tulle edges as I worked my way around.
This is your completely wreath: 
You can choose to leave it as is, or you can add some fun embelishments.
I found these stars at our local Hobby Lobby, they were $1 each. They did sell some that were 3 for $1. But I liked the little extra these would add. 
If they have wire on them and you don't want to kill your scissors, whip out a pair of wire cutters and cut off the ends.
6. Arrange your stars in a pattern that you like. I have learned that it's good to follow odd numbers. They end up more pleasing to the eye. My momma taught me that one. 
7. Once you get the stars how you like them, hot glue those babies on there.
8. Flip your wreath over and hot glue a ribbon loop to the back to hang it up.
9. Hang up your wreath and admire your work! For me, I felt that my ends were too long for my liking...it was either that or my hubby telling me our wreath looked like it had an afro...
This is was your length will be if you use an 11 inch piece of cardboard to measure your tulle and you use a pool noodle sized wreath form.
I went back and cut off a few inches and I like it better, although I find myself wondering how it would look with medium tulle around the edges. I'm still pretty happy with the outcome though!
If you like this tutorial, please follow along! I have so many more planned. And if you super like it, pin it to your hearts content! :) Thanks for visiting.
Photobucket
SHARE:

Sunday, May 17, 2015

Baseball Mom Bag with Expressions Heat Transfer Vinyl

Friends, while at SNAP! I scored some awesome Heat Transfer Vinyl from Expressions Vinyl
I was hoarding it trying to figure out the perfect craft for it and then it came to me. 

My little man has started his very first year of T-Ball this year and I am so excited for him. 
He is so cute to watch and I find myself giggling while watching him play. Seeing my little 5 year old run is my favorite! I realized quickly that I needed a place to keep all of his gear, and let's be honest...I needed an excuse to have another bag. :) 


I decided to try something I hadn't tried before and layer the Vinyl. I really wanted my Baseball Mom logo to pop. I used black, white, and glitter gold vinyl and I loved the way it turned out. 
The most important tip I have for you is to be aware that the more you iron over the vinyl as you layer, the more transparent the white will become. Also, do NOT iron directly over the vinyl. I did that on accident and I melted the vinyl. Good thing it was only a small part of it, otherwise I'd be so bummed that I ruined the bag. 

I love that with vinyl, especially the black and white, it was SO easy to weed. I kept telling my husband that it was smooth as butter! Another thing that I loved was that the vinyl has a clear transfer over it to protect the vinyl from melting so it is easy to see where you are placing it on your project. So with layering the vinyl, I could see exactly where I was placing everything. 

I shared in my personalized tote in a SNAP! post how to work with the iron on vinyl. I also think a key thing is knowing what setting to cut your vinyl with. Here's a great post to show you what you should have your machine set to if you are using a silhouette or a cricut. 

I was so happy with the finished project. It's perfect to show my pride at being a Baseball Mom and also holding all of his stuff. 

It was such a fun, easy project. I think what took the most time was figuring out which colors I wanted to stand out and then how to weed out the pieces of vinyl. It really was one of those projects you could do while watching an episode of you favorite show and then be done! I am obsessed with this vinyl! It has been hands down the easiest I have EVER worked with. I will be buying more soon! 

I know I might sound like an ad, but seriously, this post isn't compensated, I got the vinyl from SNAP and I had to share how stinking awesome it is. And I love that I get to represent as a Baseball Mom now in such a fun way. Quick, easy, projects are my specialty, so be sure to follow along for more! 


SHARE:

Tuesday, May 5, 2015

Mother's Day Questionnaire and Free Printables


I always struggle every Mother's Day to find a gift for my mom. 
It's not because I don't want to get her anything, but that I want to give her the perfect gift! 

My babies are at the perfect stage where they say the funniest things! I thought a questionnaire for them to respond to would be the perfect gift for my mom this year. 

I saw a questionnaire I loved but they only had one for Mom and Grandma, but my babies don't call my Mom "Grandma", they call her Tutu, the same name for Grandmother that I called her Mom. It is Hawaiian for Grandma and is a special title, I love that they call her that. 

It got me thinking about all of the less common names for Grandma that are used that are just as special as that of Tutu for me, so I designed a few different printables hopefully touching on those names.

#MothersDay #Printable

I decided to put it in a frame card I designed on my Silhouette but with an X-Acto Knife you could make your own frame card out of a sheet of card stock. You would choose the shape you'd like the frame to be, print it out, place it where you would like the frame to be on the card stock, trace it then cut it out! I would probably decorate the card stock first if you're going that route so you only have to cut once. 

I cut out the frame first on the Silhouette, but left the outline on the mat and just removed my card so I could embellish it with some Scotch decorative tape. 

After I was finished taping a design I replaced the card back on the cutting mat inside of the original cut so that way the Silhouette would just re-cut the original shape but through my tape. It worked like a charm! 

Once it was cut out, I taped in a picture of my babies, put the Questionnaire on the inside and that's it! It was such a simple gift but it was from the heart and I think that is what counts! 

Below are the printables that I created for Mother's Day and the multiple titles that those amazing women have. 


I hope this gift idea inspires you in your search for the perfect Mother's Day gift!

To print one off right click on the picture, save it and print it on your own computer. 

As I was finishing up this post, I thought of one more title that could be recognized on Mother's Day and have included it below. 


One of my favorite inspirational speakers named Sheri Dew once gave a talk titled: "Are We Not All Mothers?"  One of my favorite excerpts from that talk is: "Motherhood is more than bearing children...it is the essence of who we are as women."  Sheri herself has not been blessed to have children of her own (either through adoption or from her womb, etc) but she brings up some amazing points in that talk. If you are looking for inspiration or whispers of peace, check out that talk. 

I just want to thank all of the Mothers in my life and their influences on me as I have grown up, especially the influence of my Mother. She is the best Mother I could have asked for and I feel blessed daily that my children get her as their Tutu/Grandmother.

I love you Mom, and I hope you don't see this until after Mother's Day. :)


SHARE:

Thursday, April 23, 2015

Personalized Tote in a SNAP! -A 15 minute craft!

Hi Friends! 
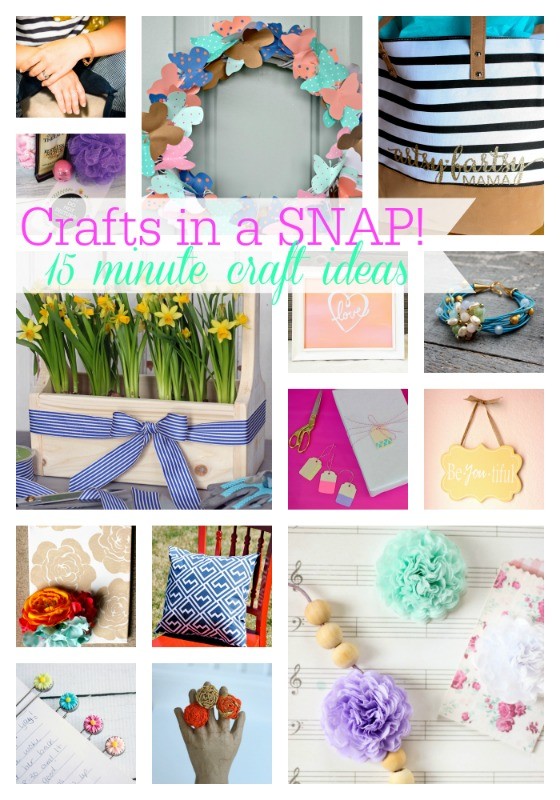
  Today I'm SO excited to be at SNAP Conference in Salt Lake City surrounded by 500 other talented crafty bloggers learning, creating, and celebrating the friendships we've made because of blogging! And to celebrate with you, I teamed up with Abbey from The Cards We Drew and a large group of bloggers to create Crafts in a SNAP {15 Minute Craft Ideas} so that ANYONE, whether beginner or seasoned pro, can learn to create fun and handmade items in no time at all! Check out my tutorial for {fill in here} coming up, then scroll down below and be sure to check out some of what my blogging friends have to offer!! I hope you have fun and find some inspiration to help you get creative! Crafts in a SNAP 15 Minute Craft Ideas

I am so excited to share with you this easy personalized tote that turns out classy and should only take you about 15 minutes. For this tote I did use my Silhouette and that's why it is so quick but I am willing to bet that if you have to do it by hand it should add an additional 15 minutes or so to your time and it is so worth it. 


I made these totes for my SNAP! secret sister and my roommate as gifts. I love how they turned out and I have to admit that I have tote envy now! 

Supplies: 
Tote that you could use an Iron on. 
Iron On Vinyl (I used Expressions Vinyl)
Iron
Silhouette 

I found these tote bags on Pick Your Plum for an amazing price but you can usually find totes at Target, Walmart, etc. I just loved the pattern on these for them.


First you will open up your Silhouette program and choose a design or type out the name in the font of your choosing. After you do this step make sure you turn it into a mirror image! If you are using a Cricut and use the software, here's a great tutorial to make an image mirrored in their software. Otherwise you just click the button pictured below where the arrow is pointing to and it turns it into a mirrored image.


Once your image/font has been flipped, send it to the Silhouette and have it cut it out. You want to make sure you've adjusted to the appropriate settings since you only want to cut through the vinyl and not the clear plastic transfer part. I believe they call it a kiss cut. Isn't that cute? 

Weed out your image and place it to the side for just a moment. You will prep your tote by ironing over where you want your design for about 10-15 seconds. From there you will place your design on the tote. Using your iron on the cotton/linen setting you will iron it in place for about 25-30 seconds. Be sure to follow the application instructions that are usually included with the vinyl.


After I ironed on the design in the front, I flipped my tote over and ironed from the back to make sure it was on there well.


Once the vinyl was cooled, I removed the clear plastic piece. To be extra sure my vinyl stayed in place I grabbed a thin piece of fabric, placed it on top of the vinyl and went over it one more time. I didn't want my vinyl going anywhere!


It was such a quick and easy project, yet added so much fun and class to a simple tote...I'm itching to make a ton more! After all, it was only 15 minutes, and I made two!


If you have any questions please feel free to leave a comment! 

Follow me on my other social media channels so that you can continue to see more fun projects and posts that I have for you. 

SHARE:

Thursday, April 9, 2015

Coming Soon To A Blog Near You!


Hi friends! 
As you know, I have taken a long blog hiatus. 
There are several reasons: job change, life change, etc. etc. 
But this reason is the most exciting! 
We are having a baby! 

This is an exciting and somewhat overwhelming time for us. I'm a little nervous about being outnumbered by our kiddos but I know that this little one is meant to be a part of our family and will bring something special to our home just like the other two babies have. 

This pregnancy has been a little different than my other two, though I have read that no two pregnancies are alike. I've had a ton of morning sickness, it was made even more miserable by my lap band, which I still hate. It is still there but not doing anything other than making it impossible to actually do anything about the nausea. So I'd feel a huge bout of morning sickness, know that I need to be sick but then can't because of my lapband. It is quite frustrating. 

Another thing that is different is my weight. The last two pregnancies I gained between 30-40 pounds. This pregnancy I am up 2 pounds. Yep you read it right, 2 pounds. I gained 5 in the first trimester but was sick at the beginning of my second trimester and lost 4 and now I am up another pound so that is two. I'm really striving to eat healthy and just go with the flow. I'm not starving or anything and I occasionally give into my cravings. Please keep in mind that a woman of my size should only gain 15-25 pounds. My doctor and I have discussed my weight and diet and everything is ok and baby is healthy and getting the nutrients it needs so no worries! I credit how healthy I have been this pregnancy to the life changing lessons I learned at Fitness Ridge, now known as Movara Fitness Resort. 

Another thing that is different this pregnancy is that at my 20 week ultrasound I was diagnosed with placenta previa as well as placenta posterior. In talking with my amazing doctor he has helped relax some of my nerves and having a posterior placenta with a previa is better since they won't have to cut through the placenta or as much of it if I have to get a c-section. I go back in three weeks to have a thorough ultrasound again and see if my placenta previa has corrected itself. I'm praying that it does and would appreciate prayers from you as well! 

Man, I feel like this is such a drab post, I just wanted to update you all and let you know how much I appreciate your support. I will be posting a lot more often because I have missed it so much and blogging makes me happy! So stay tuned for an easy, inexpensive freezer recipe in the next couple of days! 

Oh and PS...it's a boy! We are thrilled! 
SHARE:

Thursday, March 19, 2015

Back to Blogging

I'm sorry I've been MIA for MONTHS. 
A lot has been happening. 
There's been some big life changes.
Priority changes. 
Just plain old changes so I had to put my blog on hold for a while! 

I promise I will post soon and fill you on on what's happening here. 
I've missed you! 
SHARE:
MINIMAL BLOGGER TEMPLATES BY pipdig